Welcome to Station 3 on the Vendor Onboarding Learning Line. At this station, you'll learn how to select the users who can review incoming vendor data, using roles.
Learning Concepts at This Station:
About roles
Creating a test user
Defining roles
Specifying participants individually
Specifying participants with a filter
Dynamically specifying participants with a user field
About Roles
Like a role in a play, a role definition specifies the actions that a user can perform. In the same way you write a play, you start by defining a role. As the writing progresses (or in this case the process definition) you give the role various tasks to perform.
Unlike a play, however, a role can have multiple participants (users who belong to that role). When a task is assigned to such a role, each participant sees it. At that point, any of the participants can complete the task, which removes it from their queue and from everyone else's.
In the next learning station on this line, you'll begin to work with the process definitions that assign the review tasks. Here, you'll learn how permissions are defined for a role, and see how to identify participants for the reviewer roles in one of three ways:
- By directly specifying the users who participate in the role.
- By specifying filters that cause the appropriate reviewers to be automatically selected for each vendor record.
- By allowing reviewers to be individually selected for each vendor record.
Creating a Test User
To see Pulpstream's powerful role-assignment protocols at work, we're going to need at least two users in the system. So before we do anything else, we're going to take a moment to add a second user to the system, purely for the sake of testing.
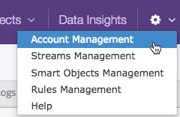
- Go the gear icon at top right and choose Account Management.
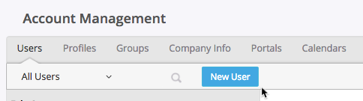
The Account Management tab opens. - You're in the Users tab, by default, so click New User.
- In the New User dialog, fill in new user's information:
- First Name - Test
- Last Name - User
- Email Address - Put in a bogus, non-existent email address.
- If the email address is already taken by another user, Pulpstream won't let you use it.
- But at the same time, you don't want strange emails going to a real person!
- An easy way to construct a temporary address is to add "2" to current email address.
- So if you current address is myName@gmail, the new address becomes myName2@gmail.
- Later, if you want that user to get emails, you can remove the "2". (The system won't let you create two users with the same email, but it will let you edit them. We won't be using it now, but at times that capability comes in handy.)
- User Name - By default, this will be the email address you entered. Accept that.
- Time Zone - Choose any.
- Primary Group - Choose any.
- Date Format - Choose any.
- Profile - Regular User
- Language - Same as your own.
- Click Save.
You have now defined a "user" who can take part in testing.
Defining Roles
For the Vendor Onboarding project, we need three reviewer roles:
- Finance Team - Reviews the tax information.
- Safety Team - Reviews the Health and Safety Certificate
- Environmental Compliance Team - Reviews the Environmental Certrificate
Let's start by creating the Finance Team:
- Go to the stream definition.
- In the Components pane on the right, scroll down past the Data Component and the many Forms you created, to the "Roles and Permissions" section.Note that three roles have already been defined. These are built in roles that cannot be deleted. They're frequently useful, so it's worth taking a moment to understand them:
- Requestor - The attributes defined for this role determines which information is seen by the requestor (the person who initiated the process) and what they can do with the record (for example, make changes or not), after the process has started.
- Task Owners - The attributes specified here define the permissions for anyone who is assigned a task in the process, unless that task has been given to a different role.
- Everyone Else - Attributes defined here apply to anyone else who has the ability to see the record. (Not everyone can. Setting up the privileges for different groups is part of the Pulpstream administration process.)
- Hover the cursor over the Roles and Permissions heading and click New.
The Add Role dialog appears. - In the Title field, give the role a name: Finance Team.
- After the Description field there are a couple of fields worth knowing about. (You won't use them, at this point, but you'll want to understand them.)
- Record Detail Form
Every stream has a default "detail form" that is used to view information in the stream record. Here you can specify a different detail form for users in this role.
Notes:- In this stream, that form is the OnboardData Form that was created when you defined the stream.
- You have since renamed that form, but it is still used, by default.
- To see that assignment or change it, you would go to the stream definition and click the "Settings" button on the right side, above the "Components" pane. From there, you would click the "Detail Forms" tab. As here, you would then be able to specify both the initial detail form users will see, plus and additional forms they could use to view record data.
- Additional Forms Available to View
- Sometimes it makes sense to define a basic detail form that most everyone starts with, and then add additional options for different roles.
- The "Additional Forms" field makes it possible to do that. When a user views a record, they'll see the initial detail form first, but they'll also have the option to switch to one of the other forms listed here.
- Record Detail Form
Before moving on to the specification of participants for this role, take a moment to explore the options available in the two other tabs shown in the dialog:
- Record Permissions - There are many things a user can do with a record, in addition to viewing it and modifying it. The settings in this tab determine which actions can be taken by participants in this role.
- Field Access Control - In this tab, you can make individual fields read-only, or hide them entirely from participants in this role.
Specifying Participants Individually
For the Finance Team, we'll select the people who will fill the role from the pool of existing users.
To do that:
- For Participant Type, choose "Specified Here."
The Participants field appears. - Participants field, begin typing the name of an existing user. Pulpstream autocompletes the names and gives you a choice of everyone who matches the initial characters. Click on the option that represents the person you want.
- Here, we know that you are a user in the system. So begin typing your name. Then, when you appear as an option below the field, click on it to add yourself to the team.
- Click the magnifier icon next to the field.
As with every field that has a magnifier icon next to it, clicking the icon opens a dialog that lets you choose possible selections. - Select the Test User you created at the beginning of this station.
The role now has two members -- you and the "test user". - At the bottom of the dialog window, click Save Changes.
Specifying Participants with a Filter
Now we will explore a different way of selecting role participants, using filters.
- Next, create another new role:
- Title - Safety Team
- For Participant Type, choose "Use Filters to Determine at Execution".
- When you do that, an initial row appears for the filtering criteria. The row has three columns:
- User Field - Fields defined in the User record that can be used for filtering are listed here. Each is defined in the Other Details section of the User record.
- For this column, choose State.
- Comparison Operator - Operators like "equal to", "contains", or "greater than" appear here, depending on the type of field that was selected.
- For this column, choose equal to.
- Comparison Value -
- You can specify a particular value, of course. You might do that when specifying combination-criteria. But more generally, you will select a field from the vendor record to compare to.
To do that:- Click the magnifying glass icon at the end of the field.
- Choose State from the list of vendor-record fields that appears.
Pulpstream shows you the identifier for that field.
It looks like this: $OnboardData.State - Copy that identifier and close the vendor-record list.
- Paste the identifier into the Value field.
- You have now automatically selected any User whose state matches the state the vendor is in. (For a more real-life example, see the notes below.)
- You can specify a particular value, of course. You might do that when specifying combination-criteria. But more generally, you will select a field from the vendor record to compare to.
- User Field - Fields defined in the User record that can be used for filtering are listed here. Each is defined in the Other Details section of the User record.
- When you do that, an initial row appears for the filtering criteria. The row has three columns:
- At the bottom of the dialog window, click Save Changes.
Notes:
- You can add additional criteria rows. If you do, all of the criteria must be satisfied for a user to become a participant in the role.
- In real life, you would typically have much more useful filtering criteria than was shown in this example. For example:
- You might have a User-group called "Financial Reviewers".
- The first row of criteria would select for users who belong to that group, by specifying the Group ID as the value to compare to. (The administrator specifies a unique ID when the group is created.)
- User records might then have an additional field that lists the states a reviewer is qualified in.
- You could then use "contains" as the operator, and select the vendor's State as the value to compare to.
- Any reviewer who is qualified in the vendor's state would then be eligible to review the vendor's credentials.
Dynamically Specifying Participants with a User Field
To select different reviewers for each individual vendor record, you would define a field of type "User" in one of the stream's Data Components. A form that displays that field could then be used to select reviewers by name.
But for the moment we'll pretend that such a field does exist, and walk through how you would use:
- Create another new role:
- Title - Environmental Compliance Team
- For Participant Type, choose "Participants derived from users in a user field"
- In the Participant field, select the data component, and then select from the list of User fields that is displayed. (In this case study, there no fields of type "User" are defined in the Vendor record. So for now, just know that this capability exists.)
- So finish by using one of the other two methods to specify participants.
- When you're done, at the bottom of the dialog window click Save Changes.
You now have 6 roles defined -- the three built-in roles you started with, and the three you just added.
Learn More
In the Pulpstream help system:
- See Roles to find out more about they can be defined and used.
- See Groups and Group Memberships to see the characteristics of groups and how users are assigned to them.
- See the Users page to find out more about how to add additional users to your Pulpstream account, and their various attributes (in particular, which groups the users belong to).
Take the Next Step
You have now defined the forms that will be used to supply and review data, and the groups of people who will be doing the reviewing. In the next stop along this learning line, you'll begin defining the process connects those components together.
