Welcome to the third stop on the Vendor Renewal learning line. At this skill station, you will learn about the many options for setting up scheduled actions -- so things automatically happen when they should, for each record in the system.
Learning Concepts at This Station:
About Schedules
Defining a Smart Object Schedule
"Next 30 Days" vs. "30 Days from Today"
When You Have Multiple Selection Conditions
Specifying Schedule Frequency
Creating Bi-Weekly, Monthly, Bi-Monthly, and Quarterly Schedules
Specifying the Scheduled Action
Creating a Smart Object Record
Testing the Scheduled Process
About Schedules
Schedules are designed to run at specific frequency. They can be run on first of every month, every quarter, or run on every day -- to name just a few options. And just like appointments, scheduled actions can be repeated.
Defining a Smart Object Schedule
Scheduled actions can be set up in many different ways! We will begin to explore those capabilities now.
Start by noticing that there is a "Smart Objects" menu item at the top of your screen. That's where you work with the records that your Smart Objects contain. But now we want to work with the definitions for those objects.
To do that:
- Open the gear-icon menu next to your profile photo (or the first letter of your name).
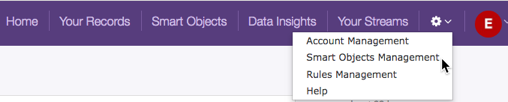
- Choose Smart Objects Management.
The Smart Object Management page opens.
(You have already used this page to create the Vendors Object, but now you are going to do something new.) - Click the Schedules tab.
- Currently, no schedules are defined. Click New Object Schedule to create one.
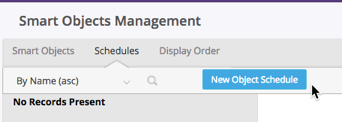
The content pane fills with the schedule-definition form.
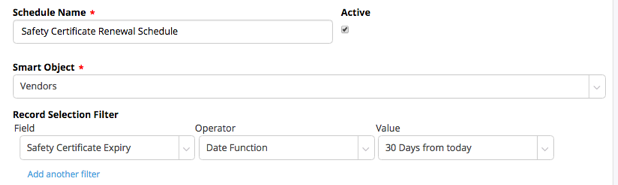
As we fill out that form, we will explore the many options that are available. - Give the schedule a name:
- Schedule Name - Safety Certificate Renewal Schedule
- Select the object the schedule applies to:
- Smart Object - Vendors
- Schedules are run on a selected set of records present in a smart object, so now we need to specify the selection criteria in the Record Selection Filter section of the form:
- Field - Safety Certificate Expiry
- Any of the record's fields can be used for the selection criteria.
(Scan the list to see what's available).
- Any of the record's fields can be used for the selection criteria.
- Operator - Date Function
- The list of operators depends on the kind of field you select.
- Try different fields, and see which operators are available.
- Since we chose a date field, the choices are "Date Function", "Date Range", "is Empty, or "is Not Empty".
- The last two are self-explanatory. If you select "Date Range", you then specify a from-date and a to-date, to define the range.
- But by far the most interesting choice is "Date Function". That selection gives you a long list of functions to choose from in the "Value" column.
- Value - 30 Days from Today
- This choice is very nearly at the end of the list.
- As you scroll down to get to it, note the many other options that are available. (In a moment, we will talk about a very similar-sounding one in more detail.)
- Field - Safety Certificate Expiry
In a moment, we'll talk about the scheduling frequency, and specifying the action to take when the scheduling conditions are met. First, though, we'll explore a couple of concepts that are worth understanding in the two short sections that follow.
"Next 30 Days" vs. "30 Days from Today"
As you were scrolling through the Date Function choices, you might have noticed the option "Next 30 Days". To make the right selection, you needed to bypass that choice to get to the end of the list, so you could select "30 Days from Today."
Here's why:
- We are going to set up the scheduling activity to run every day.
- Because it runs every day, it will identify certificates that are set to expire in exactly 30 days, at which point we will launch the renewal process.
- If we selected "Next 30 Days", and the schedule runs every day, then the condition would be satisfied every single day in the 30-day window!
- By specifying exactly "30 Days from Today", we guarantee that the scheduling condition is satisfied only once.
When You Have Multiple Selection Conditions
In the schedule-definition form, you could easily click "Add another filter" to specify additional record-selection criteria.
As with every other such situation in Pulpstream, if multiple conditions are specified, the scheduled action applies only when all of the criteria are met. So when multiple conditions are specified, they result is that they are AND'ed together.
To create an "OR" effect, so an action occurs when either of two conditions are met, you would simply specify multiple schedules, with one condition in each.
Specifying Schedule Frequency
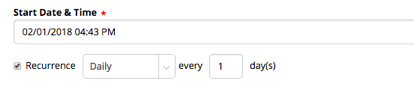
- First, specify when the record-selection process should begin:
- Start date - Today (plus a little)
When you select "Today" from the calendar, The current date and time are entered into the field.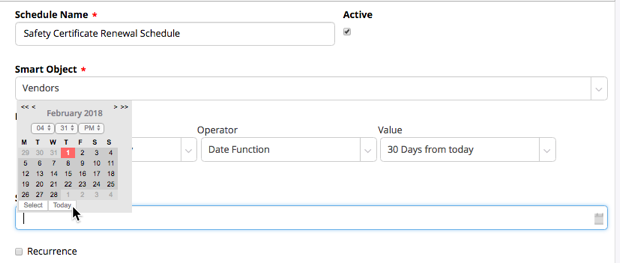
- You can't save the form until you have a future date and time, so add an hour or two to the time that is in the field, or select tomorrow's date and launch at 1:00 or 2:00 in the morning.
- Start date - Today (plus a little)
- Next, specify how often the record-selection process should run:
- Recurrence - Yes (click the box)
Additional options appear - Specify: Daily every 1 day(s)
- Recurrence - Yes (click the box)
Creating Bi-Weekly, Monthly, Bi-Monthly, and Quarterly Schedules
Although the choices for "Recurrence" appear to be somewhat limited, they actually provide a great deal of flexibility.
The choices are daily, weekly, monthly or yearly. For every choice that is longer than a day, you can specify which day (or days) to run on. If you chose "Weekly" for example, you could select Monday and Thursday as the days to run, or any other days that make sense.
For each choice, you can also specify a number of days. For example, your "Weekly" schedule could run every week, every other week, or every 3rd week. Similarly, a "Daily" schedule could run every day (as we have done), or every 3rd day, or any other number of days that makes sense for your schedule.
When you choose monthly, you could choose to run on a particular day of every 3rd month to create a quarterly schedule. Similarly for yearly schedules.
And remember, you can always set up multiple schedules for complex scheduling conditions that aren't regular enough to be handled by a single schedule.
Specifying the Scheduled Action
It is now time to trigger the renewal process when the scheduling conditions are met:
- Specify the action to take:
- Action - Create Stream Record
Note that our other choice is send an email and update the record.
That's for when all you really need to do is send a reminder.
(And in that case, the update typically clears the flag that triggered
the reminder.)
- Action - Create Stream Record
- Specify the stream:
- Choose Stream ... - Vendor Renewal
- Map the first field that need to be populated in the target record:
- Field - Certificate Type
This is the target field in the renewal stream. - Map Type - Literal
Rather than choosing another field or creating a complex expression, we will specify the value here in the mapping. - Value/Expression - Safety
Since the target field is an Enumeration, are given the list of possible choices to choose from. (So it's hard to make a mistake!)
- Field - Certificate Type
- Click Add Another Field and provide a reference to the Vendor record:
- Field - Vendor
- Map Type - Field
We are going to copy a value from the current Smart Object record into the stream record. - Value/Expression - Record ID
This is the crux of the whole operation. You are placing a reference to the current Vendors-object record into the stream's "Vendor" field. Record ID is even the default option.
- At the top of the form, click Save.
The schedule is created, and is ready for testing.
For Extra Credit...
Repeat the steps above to create a renewal schedule for Environmental Compliance Certificates. (Taking the time to do that is the best way to put these steps into your long-term memory. And as you do, you can explore the options that are available.)
Creating a Smart Object Record for Testing
We will now manually create a record in the Vendors object, so we have something to test:
- In the menu at the top of your screen, click Smart Objects.
- In the dropdown list that appears, choose Vendors.
This is how you get to the records a Smart Object contains.
- In the window that appears, there is a tab for each object.
- Below the tabs, there is a dropdown list of views you can select.
- The current view is "All Records".
- If you select the dropdown, you have the option to create a custom view where you can choose which records to display, how they ordered, and which fields are shown.
- To the right of the dropdown is a magnifier icon you can use to search for a specific record.
- to the right of that is the button you will use to create a new record.
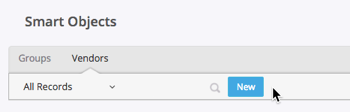
- Click New to create a new record for the tab you are in.
Since you are in the Vendors tab, so you will be creating a new Vendor record.
A form appears showing the Vendor-record fields. - Fill out the fields to create a new record for testing:
- Company Name - TEST RECORD
- Primary Contact Name - {Your Name}
- Primary Contact Email - {your non-Pulpstream email}
- Make sure the address is not associated with a Pulpstream user.
(If it is, you'll see the login screen and the internal-user interface, instead
the interface an external user sees.)
- Make sure the address is not associated with a Pulpstream user.
- Safety Certificate Expiry -
- If it's near the end of the day, and the renewal schedule will be running later tonight, select a date that is exactly 31 days from today. That way, when the scheduler runs tomorrow morning, it will see an expiration date that is exactly 30 days away. (You can then stop of the day. Tomorrow morning, you'll see the expiration-notice in your inbox.)
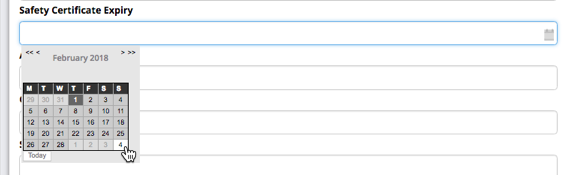
- On the other hand, if you want to continue working, set the expiration date for exactly 30 days from today. Then modify the schedule so it runs in 5 or 10 minutes. You will then see the expiration-notice in a matter of minutes.
- If it's near the end of the day, and the renewal schedule will be running later tonight, select a date that is exactly 31 days from today. That way, when the scheduler runs tomorrow morning, it will see an expiration date that is exactly 30 days away. (You can then stop of the day. Tomorrow morning, you'll see the expiration-notice in your inbox.)
- Note that the record won't actually have a safety certificate, but we don't care about that. It's a test record. (There are no file-attachments fields for certificates in any case, because we chose not to store them in the Vendor record. Those fields exist only in the Onboarding and Renewal streams, where they are available tor reviewers to examine. But only the expiration dates are maintained in the database. (And that's all we need for testing, in any case.)
- At the top of the form, click Submit.
The record is created, and appears in the Vendors object list.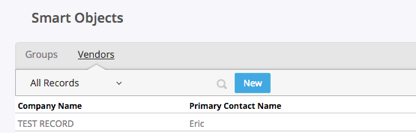
Testing the Scheduled Process
After the scheduler runs, you get an expiration-notice email.
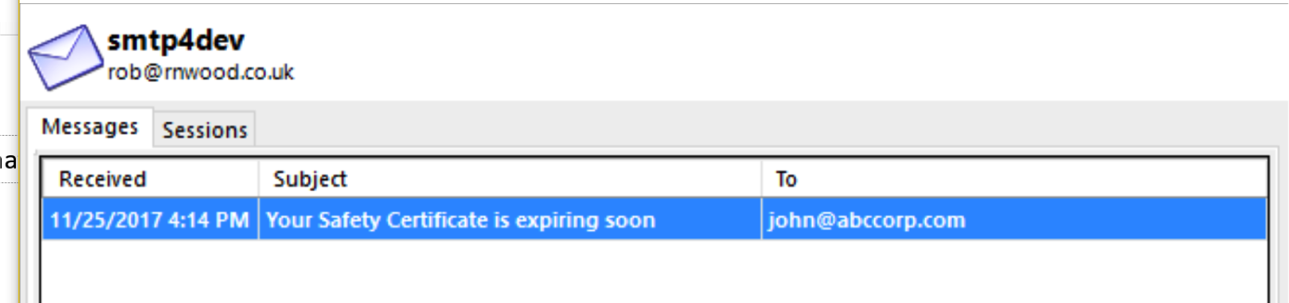
You are now ready to test the process:
- Click on the link in the email to get to the renewal form.
- In the renewal form, "supply a new certificate".
- The field isn't actually required in this form, so you don't have to supply anything. (For extra credit, considering fixing that bug!)
- In any case, this is only a test, so any dummy image or PDF document will do.
- Go to the Home page.
You see the new review task. - Under My Tasks, click on Review Certificate.
- Go to the Details tab.
This is where the reviewer inspects the uploaded certificate. - Right. It looks good. (This is a test. This is only a test...).
Click Approve.- You now got to the task-completion form, where the reviewer puts in the new expiration date.
- Note that at the top of the date selector, you can click ">" to advance to the next month, or click ">>>" to advance to the same month next year.
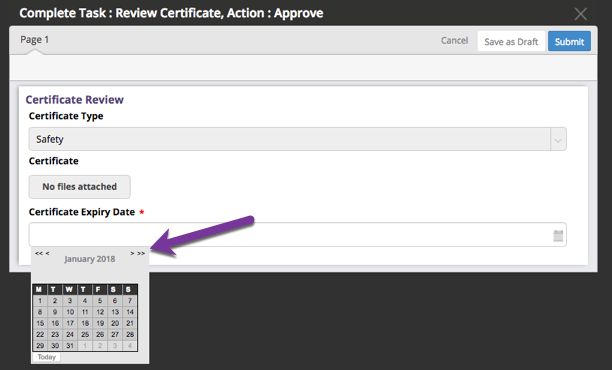
- Put in a date that is far away.
- At the top of the form, click Submit.
The test of the Safety-Certificate Renewal process is complete.
The only thing left is to save the new expiration date in the Vendor record.
Learn More
To learn more about Smart Object capabilities, see Smart Objects in the online help system.
Take the Next Step
We have now set up a schedule that automatically kicks off the renewal process 30-days before a certificate expires. And when the new certificate is approved, the reviewer supplies the new expiration date. In the next and final stop on this learning line, we will see how put that data back into the Vendors object, and store it in the right place.
