Welcome to Skill Station 3. At the last Skill Station we learned how to create report templates and auto email those reports to stakeholders.
Today we will learn how to create rich reports and future proof them.
Learning Concepts at This Skill Station:
Editing report templates
Adding photos, notes, corrective action summaries to reports
Creating dynamic reports with templates that auto update
Video Tutorial:
We have created reports that contain the answers to a checklist. But what if those questions change in the future to accommodate a new business strategy? We don’t want to have to manually update our reports template every time something changes. (Well, I wouldn’t.) Fortunately Pulpstream can do that for us, if we tell it to.
Let's learn how to edit report templates, as well as add photos, notes and corrective action summaries to them.
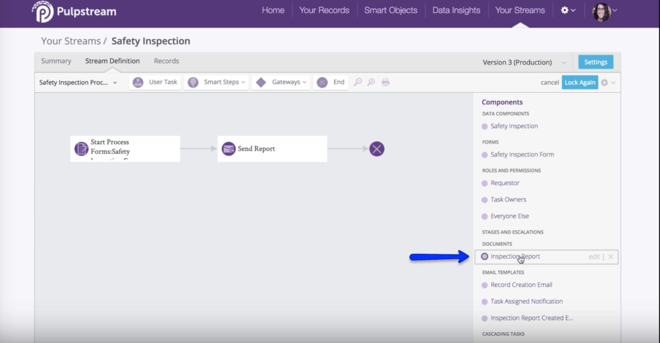
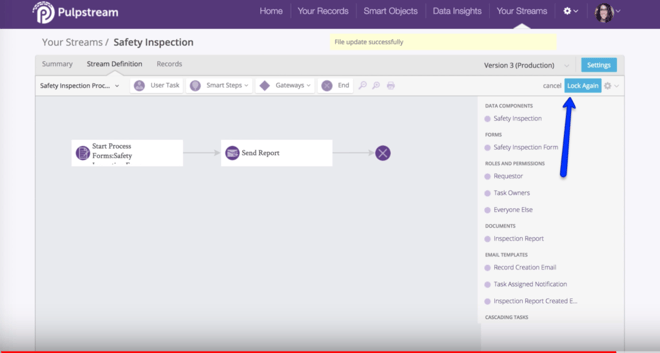
Start by going to your Streams Management area. Click on your Streams. Click on your Safety Inspections Stream to open it. Then go to the Summary tab to see the published version of your stream. Unlock it.
Note: Unlocking is a hot-change to a live version of the stream. Any changes you make will instantly be merged into the versions of the work Stream that are being used in the field. When you do this, be certain you know exactly what you are doing to prevent your colleagues from encountering errors while they’re on the job.
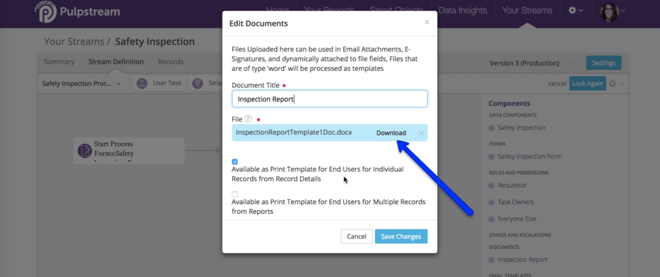
Unlock the stream. Add comments, so we have accurate records of changes we’ve made. (This comes in handy during audits.) Let's download the last report template we uploaded to the system. On your Stream Definition Canvas, in the Components Catalog, find the Inspection Report in the Documents section.

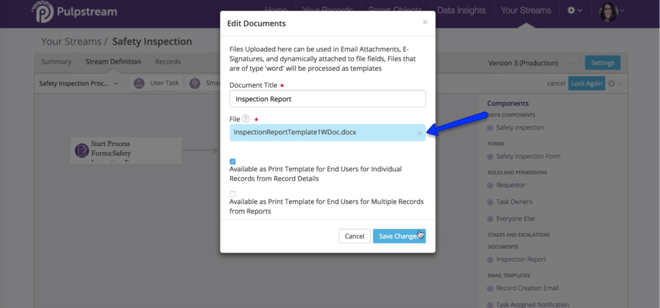
Hover your mouse over Inspection Reports to reveal the “edit” function. Click on that. In the popup screen called Edit Documents, you will see a file called Inspection Report.docx. That’s our template. Click on “Download.”
As you saw when created a test inspection, the inspector has the option to attach photos, make notes, and recommend corrective actions. Those are not appearing in our reports right now, because we have not added those to our template. Let's enable that functionality. And while we are in there, we are also going to create operational resilience to change. All report templates in Pulpstream are basically Word documents. Subsequently we can use some of Word’s features to future-proof our report templates.
Today, we will be using Word’s bookmarks feature to automatically import all the questions and answers we want in our reports. Let’s start by making room for our bookmarks.
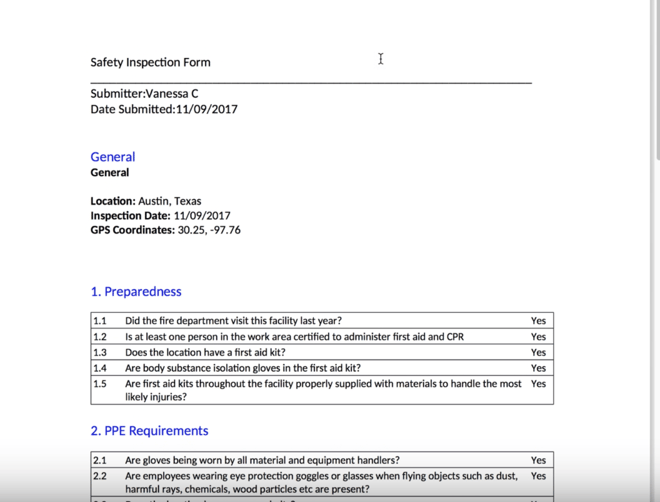
Go back to your Inspection Report Template. Delete the Preparedness and PPE Requirements sections. All of them, including the titles. Afterwards it should look like this:
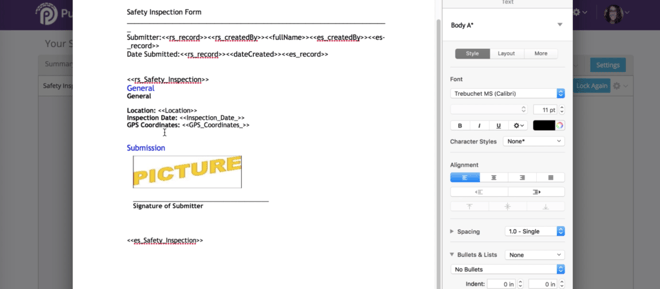
Put your cursor below the GPS Coordinates section.
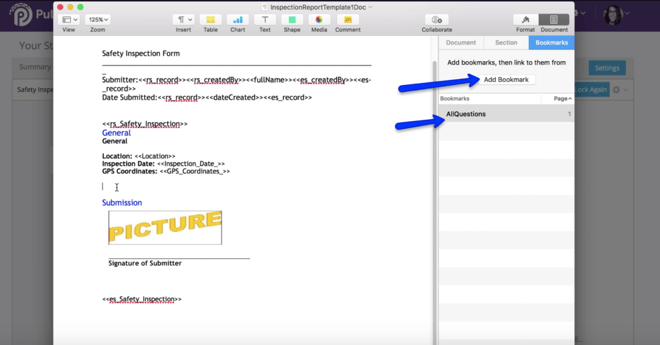
If you’re on a PC and using Word to edit this document, click on “Insert Tab.” Then click on “Bookmark.”
If you’re on a Mac and using Pages, click on “Document” in the upper right corner. Click on “Bookmarks.” Click the “Add Bookmark” button.
A bookmark called img_signature_of_submitter_sig should already be there. Let it be.
Add a bookmark called “AllQuestions.”
Save that. Now let's test it to see if it works. Go back to your Stream Definition Canvas. Click on the gear icon in the top right side of your stream canvas. In the pull-down menu, select “Test Document Print Template.”
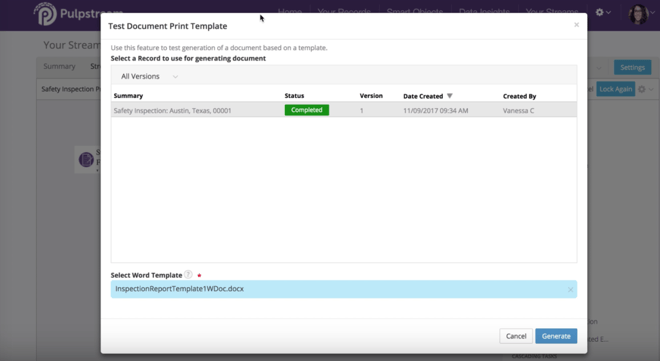
Select the record we created during our test inspection. Upload the Inspection Template we just edited. Click on the Generate button. Your browser will start downloading a .pdf version of the report. Open that.
You will see that the sections we deleted earlier are now there, along with any photos we uploaded, and notes we made during our tests.
Corrective actions will also appear with due dates and current status. If in the future you add or delete questions from your Inspection Form the changes will automatically be imported into the Template. So you won’t have to make it again!
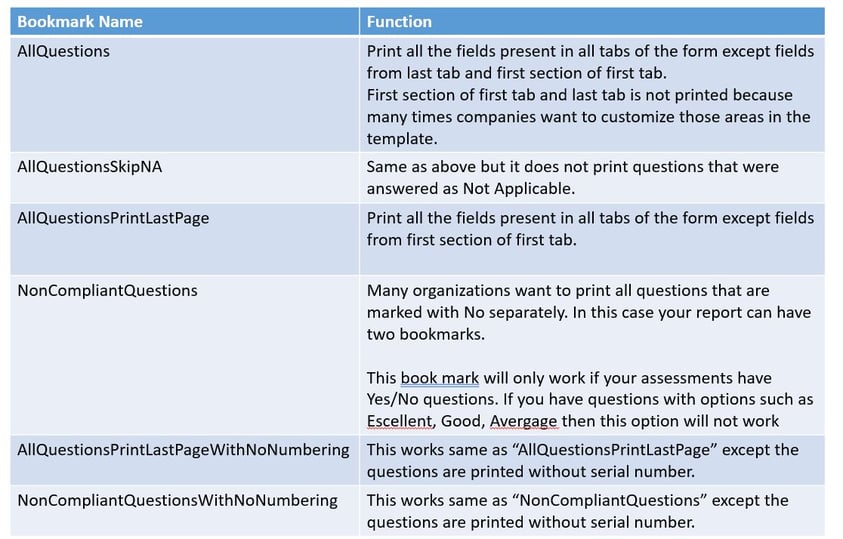
Pulpstream has 4 bookmarks you can use to automatically import data to your reports.
Next, let's upload the latest and greatest version of our report to the system. Go back to your Stream Definition Canvas to upload your Inspection Report. It’s a doc, so let's upload it to documents section of your Components Catalog.
Click on Edit. Remove the old Inspection Report. Upload our latest and greatest version of the template.
Save your changes. Lock this version of your stream.
And Voila! You’ve future-proofed your reports. Test this out by doing an inspection.
(Go to your Home screen. Click on the Submit New Form button to complete the digital inspection.)
This concludes our visit to this Skill Station. At the next Skill Station we will learn how to trigger corrective actions.
