Learning Concepts at This Station:
Using form validations
Configuring rule conditions with expressions
Video Tutorial:
Today we will learn how to build validations. When an employee submits a request to take a leave of absence, they should not be able to submit a request with an end date that is before the start date of the leave application. We are going to learn how to configure rules to validate information such as this.
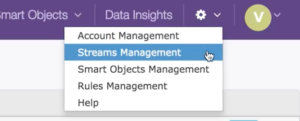
Since we did not check in or publish our stream during the last Skill Station visit, we can simply open the working version of our stream. Access your Streams Management dashboard. Click on the gear icon by your profile photo. Select “Streams Management” from the pull-down menu.
Choose the Leave of Absence stream. On the Summary tab, click on the working version of your stream to open it.
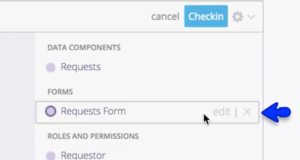
Now if a user enters the wrong dates in a leave of absence request, we want to inform them right away. We will use a form validation to do this. On our Stream Definition Canvas, find the Form called “Request Form.” Double click on it to open it.
In the Request Form configuration popup, you will see that you have many tabs. We start on the Web/ Mobile layout tab, which is where we design our user interfaces. Click on the Pre Submit Rules tab. This is where we will add the rules that will be invoked when a user presses the “Submit” button on a form.
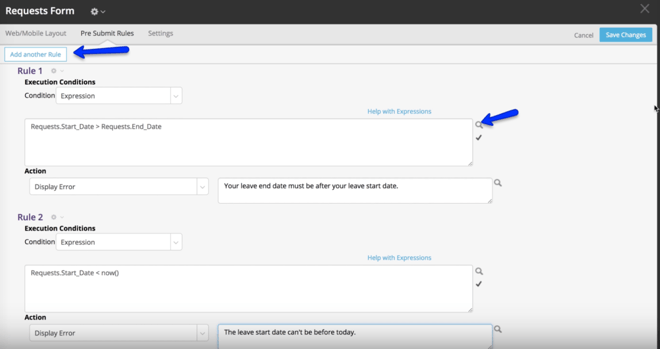
Let’s click on the “Add Rule” button to add a new rule. Rule configuration allows you to to specify when to trigger a rule with expressions. For our purposes,want the rule to be triggered if “End Date” is less than “Start Date” is true. We will accomplish this by altering our execution conditions and writing an expression. In the Execution Conditions pull-down menu, select “Expression.” We can use the merge field value finder tool to get the merge tags for the start date and end dates. Click on the magnifying glass icon to find those. Copy them. Paste them into the Expression box. Using these 2 values, we will build the expression:
Request.Start_Date > Request. End_Date
When that expression is true, we want the Action to be “Display Error.” Select that in the pull-down menu under Action. To the right of this, we can type in a custom error message here.
For example, “Your leave end date must be after your leave start date.”
That would take care of that user error. What if we want to prevent people from applying for leave retroactively? To do that we would add another rule. Click on the Add Rule button. Tell Pulpstream that the Condition will be an “Expression” by selecting that in the pull-down menu. In the expression box, we will insert a useful function that always returns the current time. It is the now() function. Pulpstream has a variety of useful functions, which you can always find by clicking on the text “Help with Expressions.”
Use the finder tool to find the value for the request start date. Copy it. Paste it into the expression box. Then add a less than sign and the now function, which is the word “now” appended with open and a close parenthesis symbols.
Request.StartDate < now()
For the Action, again we want to display an error when this user action happens. Select “Display Error” in the Action pull-down menu. To the right of this, type in the custom error message. Eg “The leave start date cannot be before today. “
At this point your Pre Submit Rules tab will look like this:
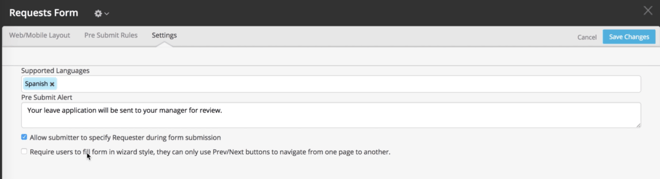
Before we move on, let’s look the Settings tab. On this tab, we can configure the form so that it supports languages and a pre-submission alert message. If you have translated this form into multiple languages, and imported multi-language labels, this field will appear as a pull-down menu with the names of those languages. (You can learn about that in the X Line.)
The pre-submit alert is a message that you can show to users when they submit this form. Let’s include one. Type in: “Your leave application will be sent to your manager for review.”
Under this there are 2 checkboxes. Check the box by Allow submitter to specify requester during form submission. This option is useful when a form is submitted on behalf of someone else, such as an assistant who files forms for his boss.
At this point your tab should look like this:
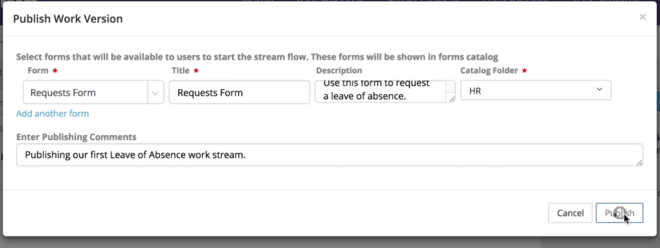
Save the form. Publish the stream. Organize it into a catalog folder if you like. If you have multiple digital work streams, each form that a user has to fill out can be sorted by category which you create on the Work Version Publishing page.
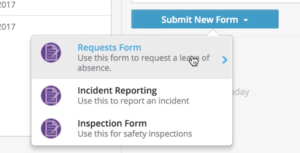
Now let’s create a test record to see if our validations are working. Go to your home page. Click on the submit new form button.
Or go to the stream, click on the gear icon, and click on “Create Test Record” in the pull-down menu.
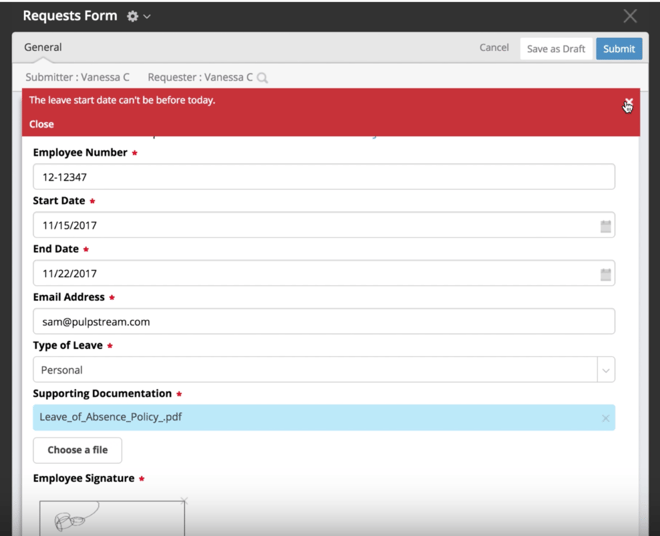
Fill out the form.
Notice that in the header area your name appears as both the submitter and the requester. You can change the requester to be someone else if you are filing this on behalf of someone else. The employee number field has the input mask we defined earlier, so you can only enter it in a certain format. Fill out the form.
When you press submit, your alert is on its way. If you provide incorrect dates, error messages will appear in red. This is the desired effect.
And that’s it. You have learned how to configure rules to validate form fields. At the next Skill Station we will learn how to link the employee number to the employee record in a Smart Object.
